
How It’s Made: Abstract Grunge Textures in Our Abstract Auto Body Series
We may make money if you purchase products and services when we use affiliate links. As an Amazon Associate we earn from qualifying purchases. Thank you for your support!
How It’s Made is our regular feature where we share the techniques and methods used to create many of our photos, backgrounds, textures and other creative assets here at Stein Mixed Media.
We recently uploaded some great textures in our Abstract Auto Body Series and they are so unique I thought it would be fun to share the story of how we made these and some of the techniques we used.
Scratching the Car is No Fun
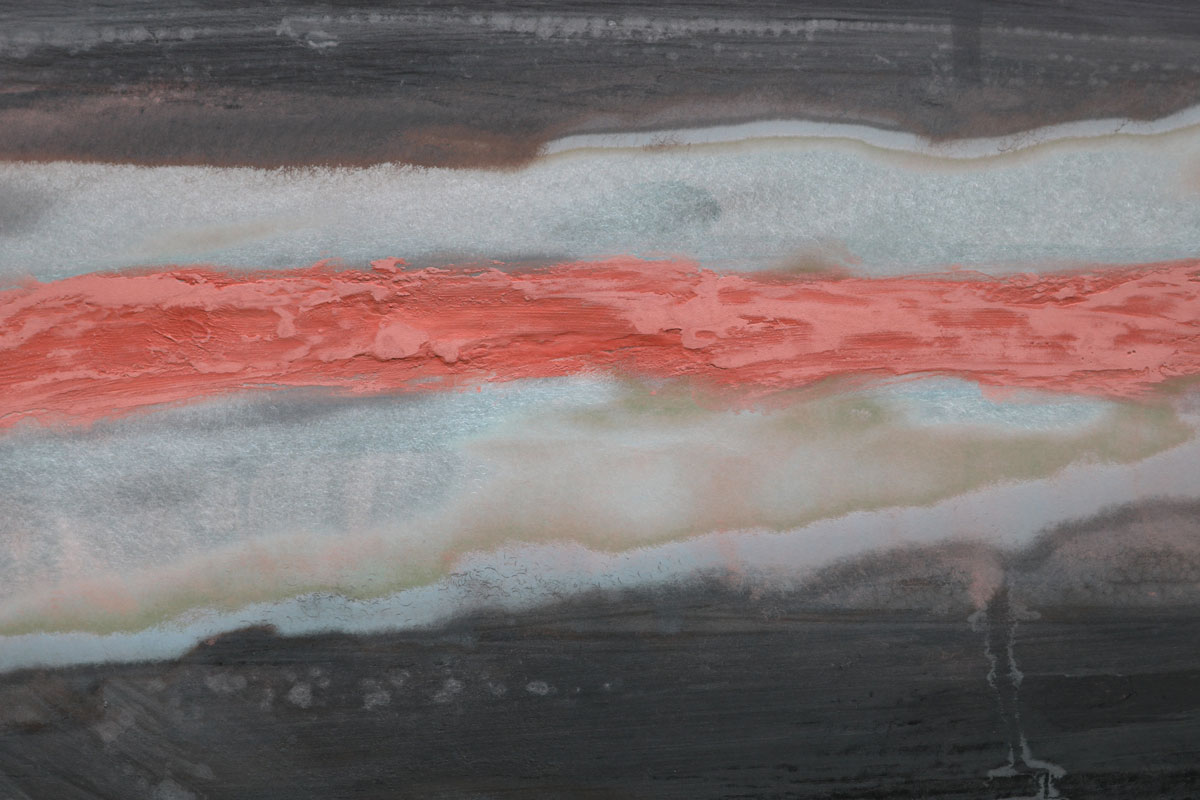
This series, like many of the series we create, was born out of necessity. Ray accidentally scratched our dear car while cutting the grass with his lawn tractor.
While most people would be upset about their car being scratched, it ended up being a good thing because we were able to get a lot of great images just from the repair work itself.
Here’s a picture of the scratch in our car in context that helped give us all these great textures!

Auto body work is a lot of work – there’s tons of time involved and it definitely requires some patience! It really does take a long time to do right, and of course it’s usually something best left for professionals because it’s VERY easy to make mistakes and do things the wrong way.
Many of our abstract auto body textures were actually made from all the mistakes!
In the beginning stages, it’s horrifying what the car looks like – but it’s also a great time to capture textures that you just normally wouldn’t find too often!
Each layer of body putty and sanding gives you some fun and unique textures every single time!
And thankfully, eventually we did get it “right” and the car looks normal again!
How We Photographed the Textures
There are many ways to photograph textures, but the best way of course is with a tripod and a good camera. We used our Canon t6i to photograph many of the images during the “messy stages” – our Canon t6i is our go-to camera for all things that could potentially be messy!
Ray always shoots his photos in manual mode, taking care to pay attention to the exposure, focus, aperture, ISO and other details. This gives you the most control – trying to photograph textures in auto mode or with auto focus can be quite frustrating!
Another VERY important thing in photographing textures like these is to use a timer on your camera. Using a timer helps ensure you don’t get the “camera shake” while taking your photos. If you don’t like to use a timer, you can also look into using a remote – I often use my iPad as a remote when I’m photographing items with my overhead tripod in the studio.
All of our photos were photographed outside also, so when combined with a tripod and the right camera settings it’s easier to get the detail without any kind of blur or grain.
Use These Textures for All Kinds of Creative Projects!
There are so many creative ways you can use these textures in our series – you could use them in digital art like I do with my layered collage technique or you could even use them as overlays for making your own grunge textured paper backgrounds.
And of course, in the rare chance where maybe you are writing a blog post about auto body mistakes or even creating an ad for an auto body repair shop to encourage people to not try to DIY it yourself, these photos are certainly suitable for that!
All of our photos include a very generous commercial use license that gives you all kinds of ways you can use these for either personal, professional or commercial use. You are only limited by your imagination!
No posts